The power of imagination created the illusion that my vision went much farther than the naked eye could actually see..
~Nelson Mandela
Everyone loves a good optical illusion, whether you are watching a natural phenomenon as a rainbow in awe, laugh at an unexpected or impossible image through a confusing perspective or simply enjoy figuring out the puzzle of reality. Some optical illusion photos go viral and become a phenomenon like “the dress”, being discussed at nauseam in popular media, others are specifically used in advertising. So, how do you create optical illusions?
To create and photograph an optical illusion, you need to understand how they work. Different types of optical illusions happen for different reasons. Forced perspective, for example, is easy to recreate and often used in photography or the film industry. A fata morgana, on the other hand, is something you have to search for in the right places.
Creating forced perspective photos
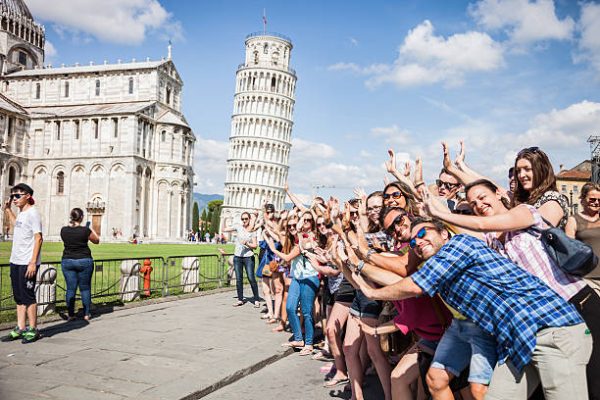
Forced perspective photos are very popular with tourists “holding up” the leaning Tower of Pisa, “crushing friends” at the Salar de Uyuni (salt flat) in Bolivia, or people trying to “hold the setting sun between their fingers”. A forced perspective illusion works by making something look smaller or bigger than it is in reality.
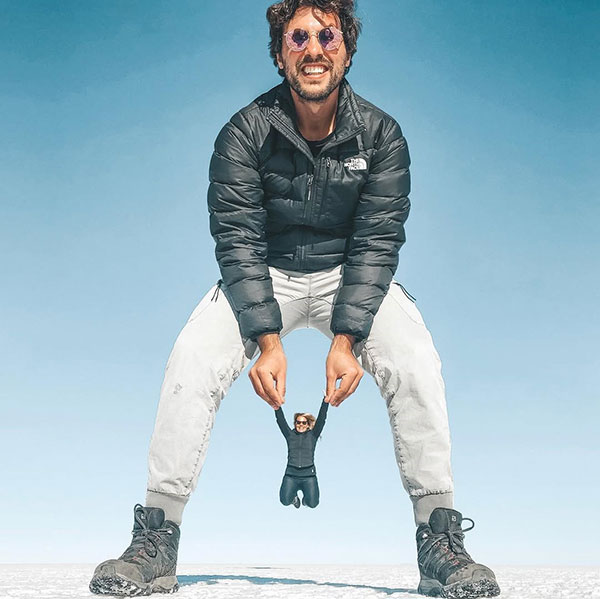
Image source: Vanessamamueller
The key ingredients for a forced perspective photo are:
- Two or more objects. This can be landmarks, people, objects or even the sun or moon.
- Distance and depth. The greater the distance between the objects, the easier to manipulate the perceived size. This is why great empty spaces like the sky, beaches or deserts work well.
- Correct camera angle. Make sure the objects (for example the moon and pinched fingers) align correctly. This should be easier nowadays with digital cameras, where you can see the end-result on your screen. Lower angles make objects look taller. Higher angles make them look tiny.
- Framing. Use the rule of thirds for the composition to make the photo more interesting and engaging.
- Focal point. Avoid blurring of the object in the background by disabling portrait mode and tapping and holding the subject that you want in focus. A small aperture (f/8 or higher) on a regular camera also ensures that both foreground and background remain in focus.
- Shadows. Watch out for shadows that reveal the real location of the objects
You can see many examples of forced perspective photography here on EyeCon.
Creating optical illusions with reflections
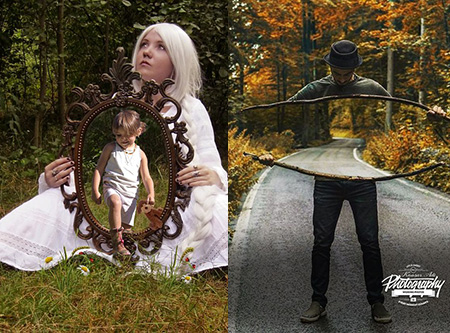
Reflections can create stunning and surreal illusions by blending reality with mirrored images. Water, glass, and polished surfaces can all be used to trick the eye into seeing something unexpected.
Here are some ideas:
-
Puddle Photography – After rain, puddles can create mirror-like reflections. Flip the image upside down in post-processing to make it look as though people are walking in the sky.
-
Glass and Windows – Capture people or objects through glass to create ghostly, layered effects where the reflection blends with the real scene.
-
Perfect Symmetry – Use still bodies of water to double an image, making it look like the top half is floating above an invisible mirror.
-
Disappearing Objects – Position mirrors carefully to “erase” parts of a person or object, making them look cut in half or transparent.
-
Playing with Angles – A slight shift in position can completely change the illusion. Experiment with different angles to see how reflections distort reality.
Reflections work best with clean surfaces and strong contrast. Bright lighting or high-contrast subjects will enhance the illusion.
Check out the examples of optical illusion with reflections that we have collected as inspiration.
Using shadows to create optical illusions
Shadows can be manipulated to create mind-bending illusions, making objects appear to float, change shape, or even take on a life of their own. By carefully positioning light sources and subjects, you can craft surreal images that trick the eye.
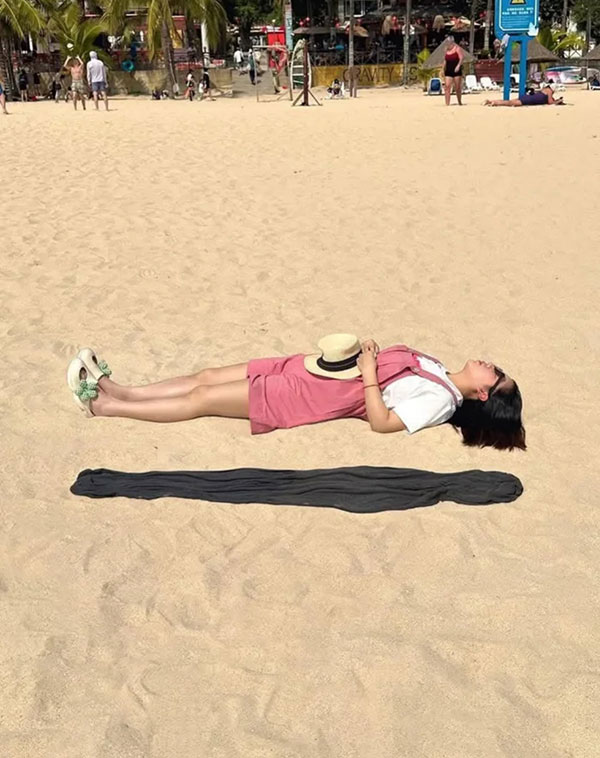
Image source: csprosper8
-
Floating Effects – Just like in the beach photo where a towel mimicked a shadow, placing a dark object slightly away from the subject can make them appear to hover above the ground.
-
Shape-Shifting Shadows – Arrange everyday objects so that their shadow creates something unexpected, like hands forming animal silhouettes or objects aligning into hidden messages.
-
Playing with Multiple Light Sources – Using two or more light sources can create overlapping shadows, making it look like a person has multiple arms, faces, or even a ghostly twin.
-
Stretching Reality – A low-angle light source (like the sun at sunrise or sunset) stretches shadows dramatically, making small objects appear giant or distorting proportions.
-
Hiding and Revealing – Shadows can obscure or reveal parts of an image. For example, positioning a person so their shadow “completes” another object can make for an eerie or artistic illusion.
Shadows work best with strong, directional light, such as sunlight or a bright artificial source. Experimenting with angles and distances can drastically change the final result.
Don’t forget to check out the examples of optical illusion with shadows we collected.
Bringing Optical Illusions to Life
Creating optical illusion photos is about playing with perception. Through forced perspective, reflections, or shadows, with a little creativity, the right angles, and careful attention to light and composition, you can transform ordinary scenes into mind-bending visuals that could go viral.
Grab your camera, experiment with different techniques, and start crafting illusions that make people do a double-take. And if you need inspiration, check out the best illusion photos we’ve collected on EyeCon!